Agent Collaboration
Summary
Agent collaboration enables you to build sophisticated AI systems by combining multiple specialized agents. Instead of creating one complex agent that tries to do everything, you can create an orchestrator agent that intelligently delegates tasks to specialized subagents—each focused on a specific domain or function.
This approach offers several key benefits:
- Modularity – Build and maintain specialized agents independently, making updates easier
- Expertise – Each subagent can be optimized for its specific task with tailored instructions and data sources
- Scalability – Add new capabilities by creating new subagents without modifying existing ones
- Clarity – Simpler, more focused agent configurations that are easier to understand and debug
The Orchestrator-Subagent Model
The orchestrator-subagent pattern works like a team with a manager and specialists:
- Orchestrator Agent – The “manager” that receives user requests, understands the overall goal, and decides which subagent(s) to call to fulfill the request
- Subagents – Specialized “experts” that handle specific tasks like querying databases, managing tickets, analyzing documents, or interacting with particular systems
When a user sends a query to the orchestrator, it analyzes the request and automatically routes it to the appropriate subagent(s) based on their descriptions and capabilities. The orchestrator can even call multiple subagents in sequence or parallel to handle complex, multi-step workflows.
Creating an Orchestrator Agent
Let’s walk through setting up an orchestrator agent that can delegate to specialized subagents.
Step 1: Create Your Orchestrator
-
Navigate to Agents from the left sidebar and click Create New Agent
-
Give your orchestrator a clear name and description that reflects its role as a coordinator
- Example Name: “IT Support Orchestrator”
- Example Description: “Routes IT support requests to specialized agents for hardware, software, and access management”
-
In the Instructions section, write a system prompt that explains the orchestrator’s role:
- Important: In the orchestrator’s configuration, you typically don’t need to add data sources. The orchestrator’s job is to route requests, not answer them directly. The subagents will have their own specialized data sources. If there is a data source that would be helpful to routing, feel free to include that.
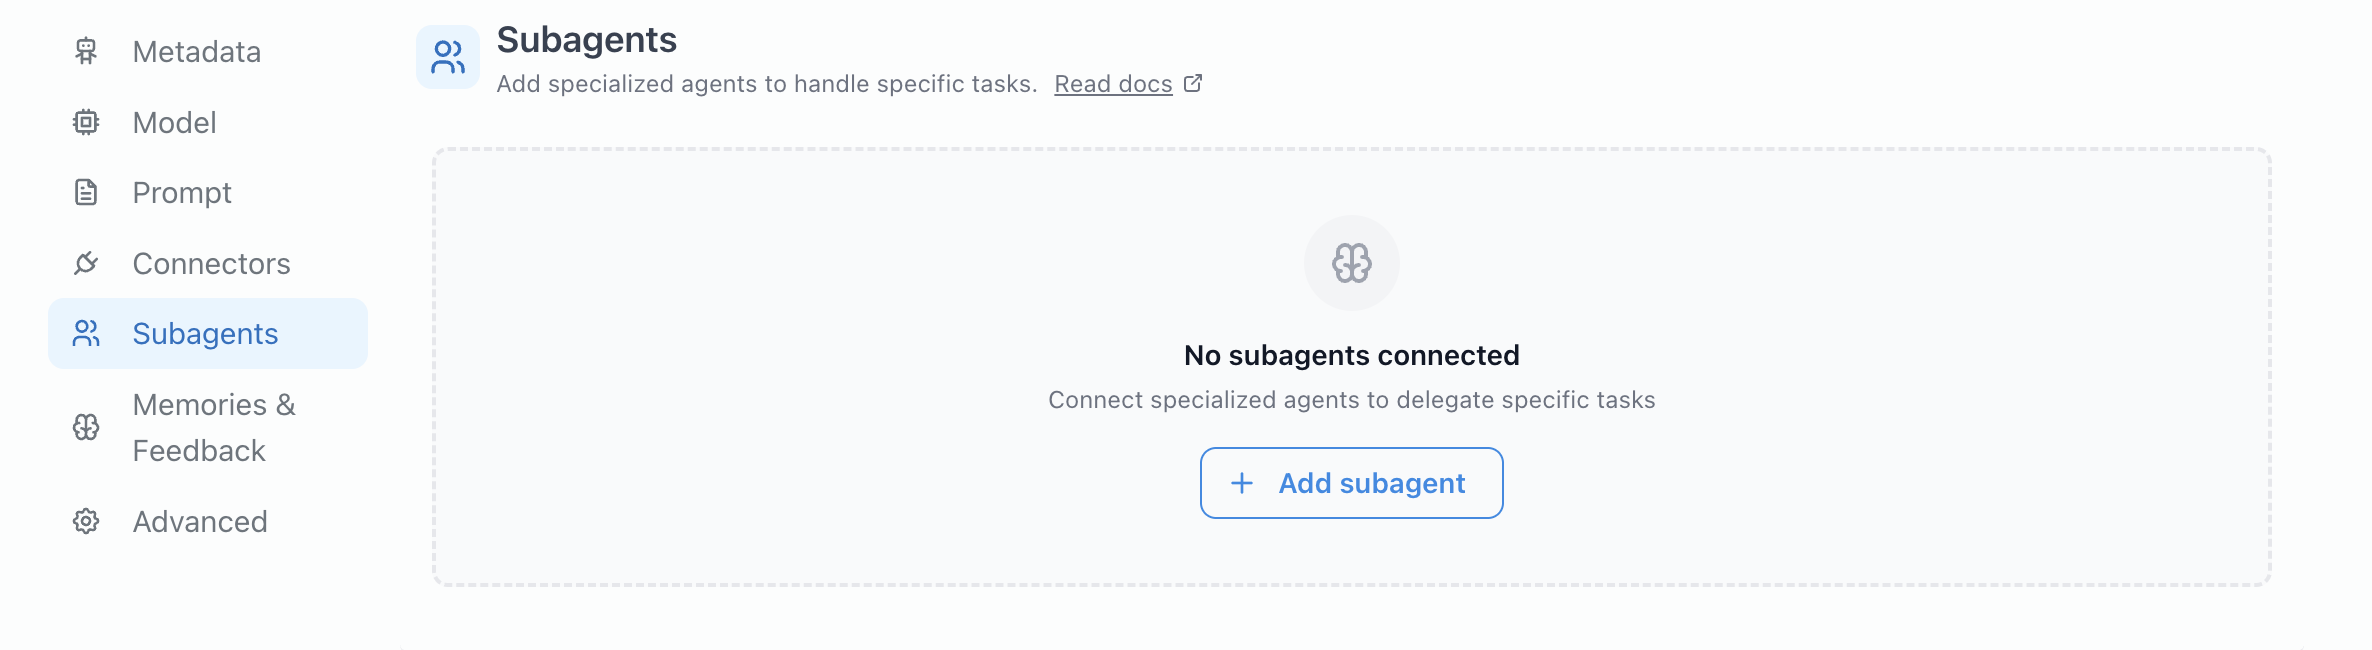
Step 2: Connect Subagents
Now you’ll add subagents that your orchestrator can call. You have two options: select existing agents or create new ones.
-
In your orchestrator’s Configuration tab, scroll to the Subagents section
-
Click Add Subagent to search through available agents or create a new one
Option A: Select an Existing Subagent
If you already have specialized agents set up or another team has made their agent discoverable:
-
In the search bar, look for existing agents by name or description
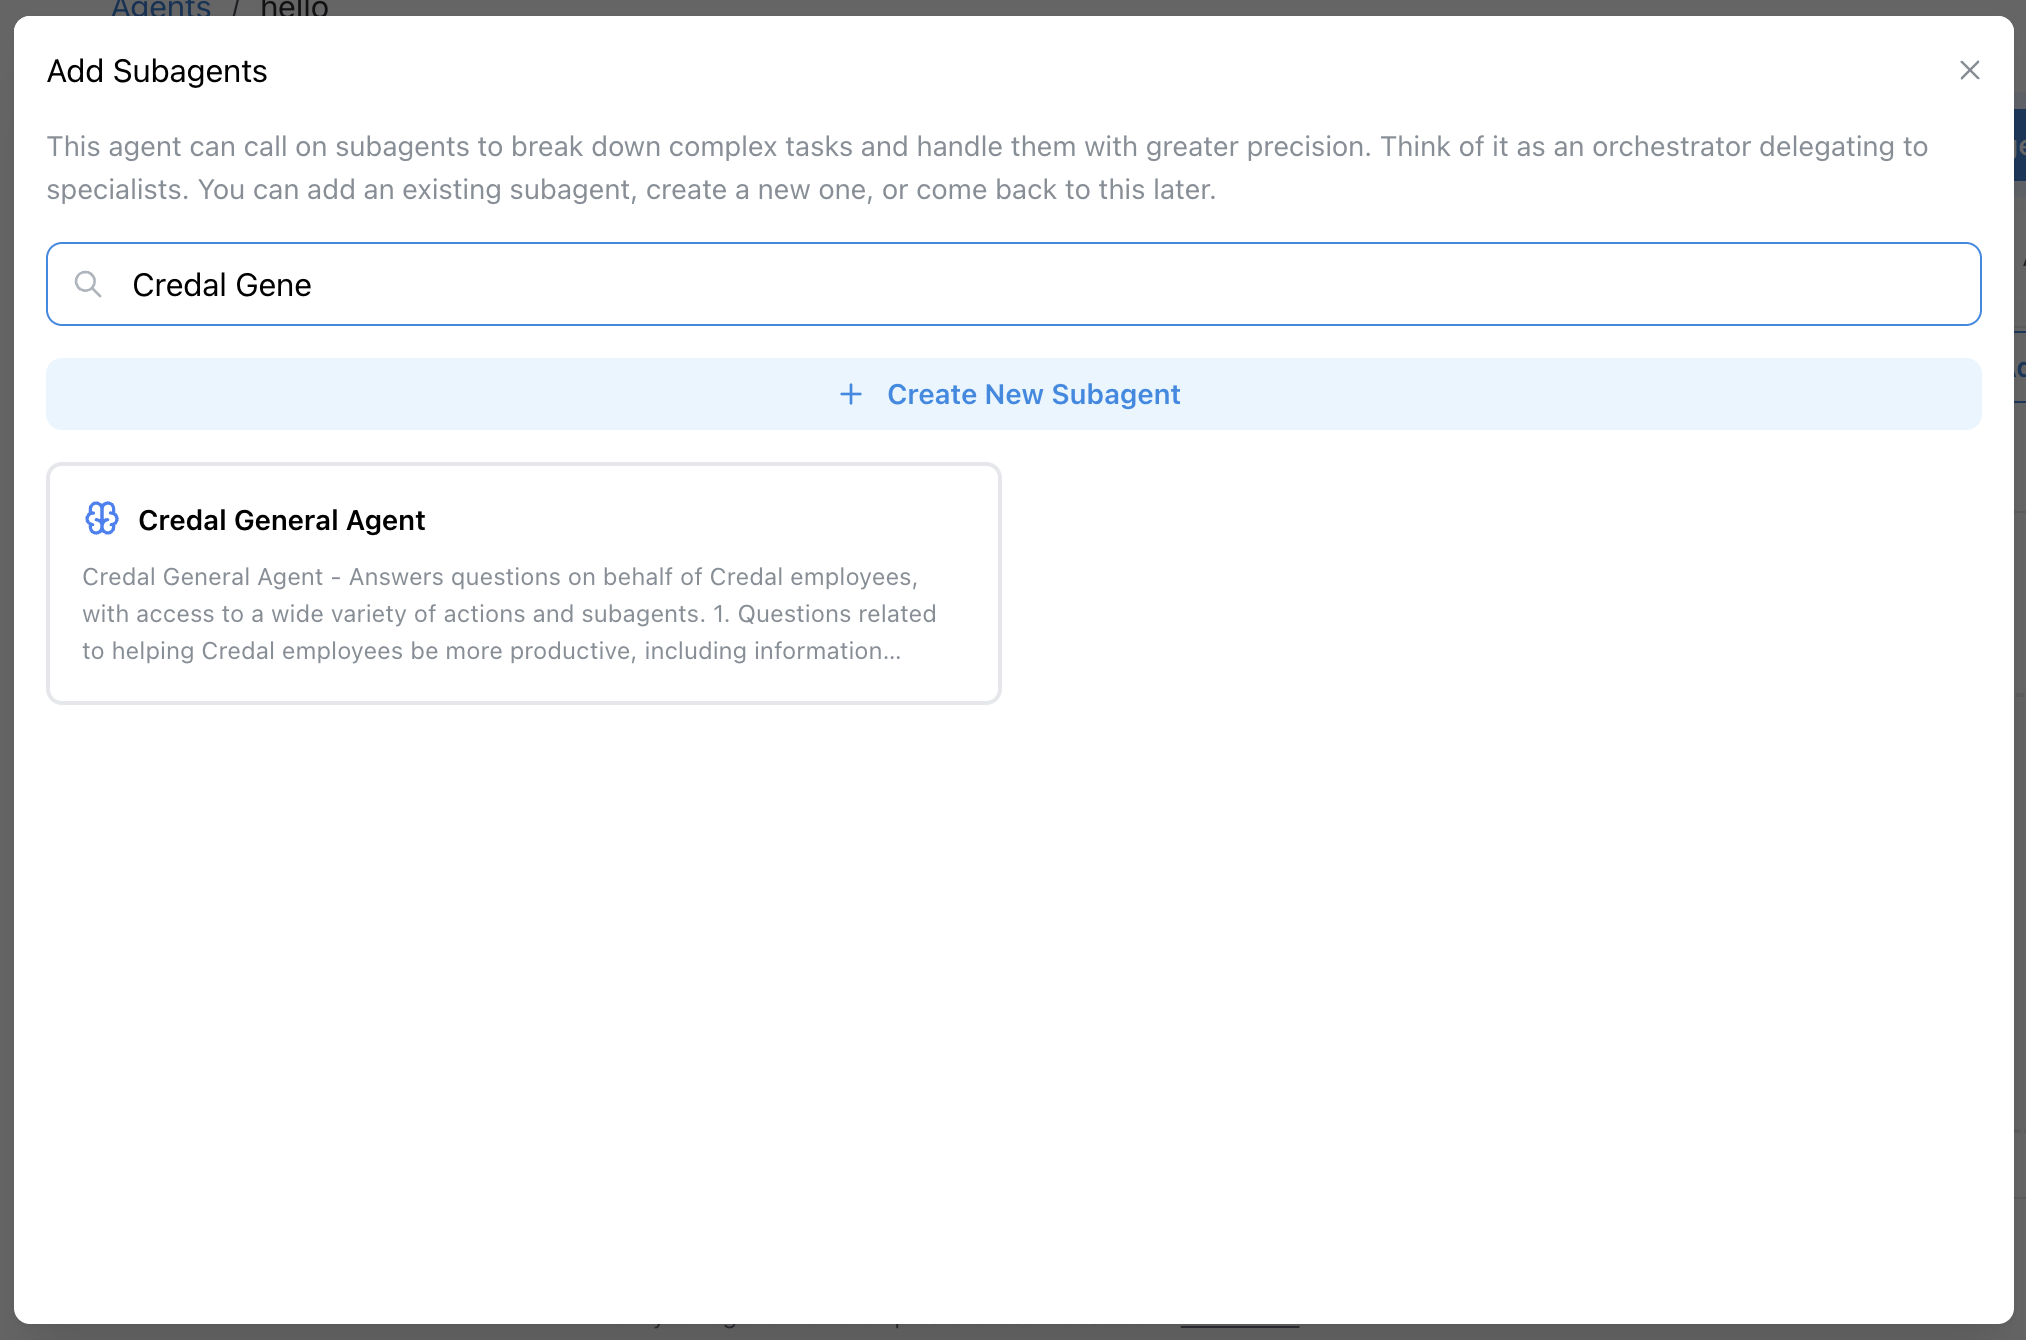
-
Select the agent(s) you want to connect and click Add
-
The subagent will now appear in your orchestrator’s subagents list
Note: If you don’t see the agent you’re looking for, it may not be discoverable yet. See the “Requesting Access to Use Someone Else’s Agent” section below.
Option B: Create a New Subagent
If no existing agent fits your needs, you can create a new one directly:
-
In the Subagents section, click Create New Subagent
-
Configure your subagent with:
- Name: Descriptive name for the specialty (e.g., “Hardware Support Agent”)
- Description: Clear explanation of what this agent handles—this description helps the orchestrator decide when to call it
- Instructions: Detailed system prompt for handling its specific domain
- Data Sources: Connect relevant data sources for this specialty
- Actions: Add any actions this subagent needs to perform its tasks
-
Click Save to create the subagent
The subagent is automatically connected to your orchestrator—no need to publish it separately. Publishing is only required if you want to make your agent discoverable to other teams (see “Making Your Agent Discoverable” below).
Step 3: Test Your Orchestrator
After connecting your subagents:
-
Go to the orchestrator’s Test tab
-
Try queries that should route to different subagents:
- “My laptop screen is flickering” → should call Hardware Support
- “I need access to the finance folder” → should call Access Management
- “Excel keeps crashing” → should call Software Support
-
Observe which subagent the orchestrator calls and verify it’s making the right routing decisions
The orchestrator will automatically select the appropriate subagent based on your instructions and the subagent descriptions. You can refine the orchestrator’s instructions or subagent descriptions if routing isn’t working as expected.
Requesting Access to Use Someone Else’s Agent
If you want to use another team’s agent as a subagent in your orchestrator, but don’t see it available when searching in the Subagents section:
-
Find the Agent Owner
- Ask your AI platform admin if an agent exists or who the owner is for a particular agent
-
Request Access
- Contact the agent owner directly (via Slack, email, etc.)
- Explain your use case and why you need their agent as a subagent
- Provide the name of your orchestrator agent that needs access
-
Agent Owner Grants Access
- The agent owner should make their agent discoverable by following the instructions in “Publishing Your Agent for Discovery” below
-
Connect the Agent
- Once the agent is made discoverable, return to your orchestrator’s Configuration tab
- Go to the Subagents section and search for the newly-accessible agent
- Select it and click Add to connect it to your orchestrator
Publishing Your Agent for Discovery
If you’ve built a specialized agent that other teams or orchestrators should be able to use, you need to make it discoverable. This allows other agent builders to find and connect to your agent as a subagent.
-
Open the agent you want to make available to others
-
Navigate to the Publish tab
-
Enable the Callable toggle to make your agent discoverable
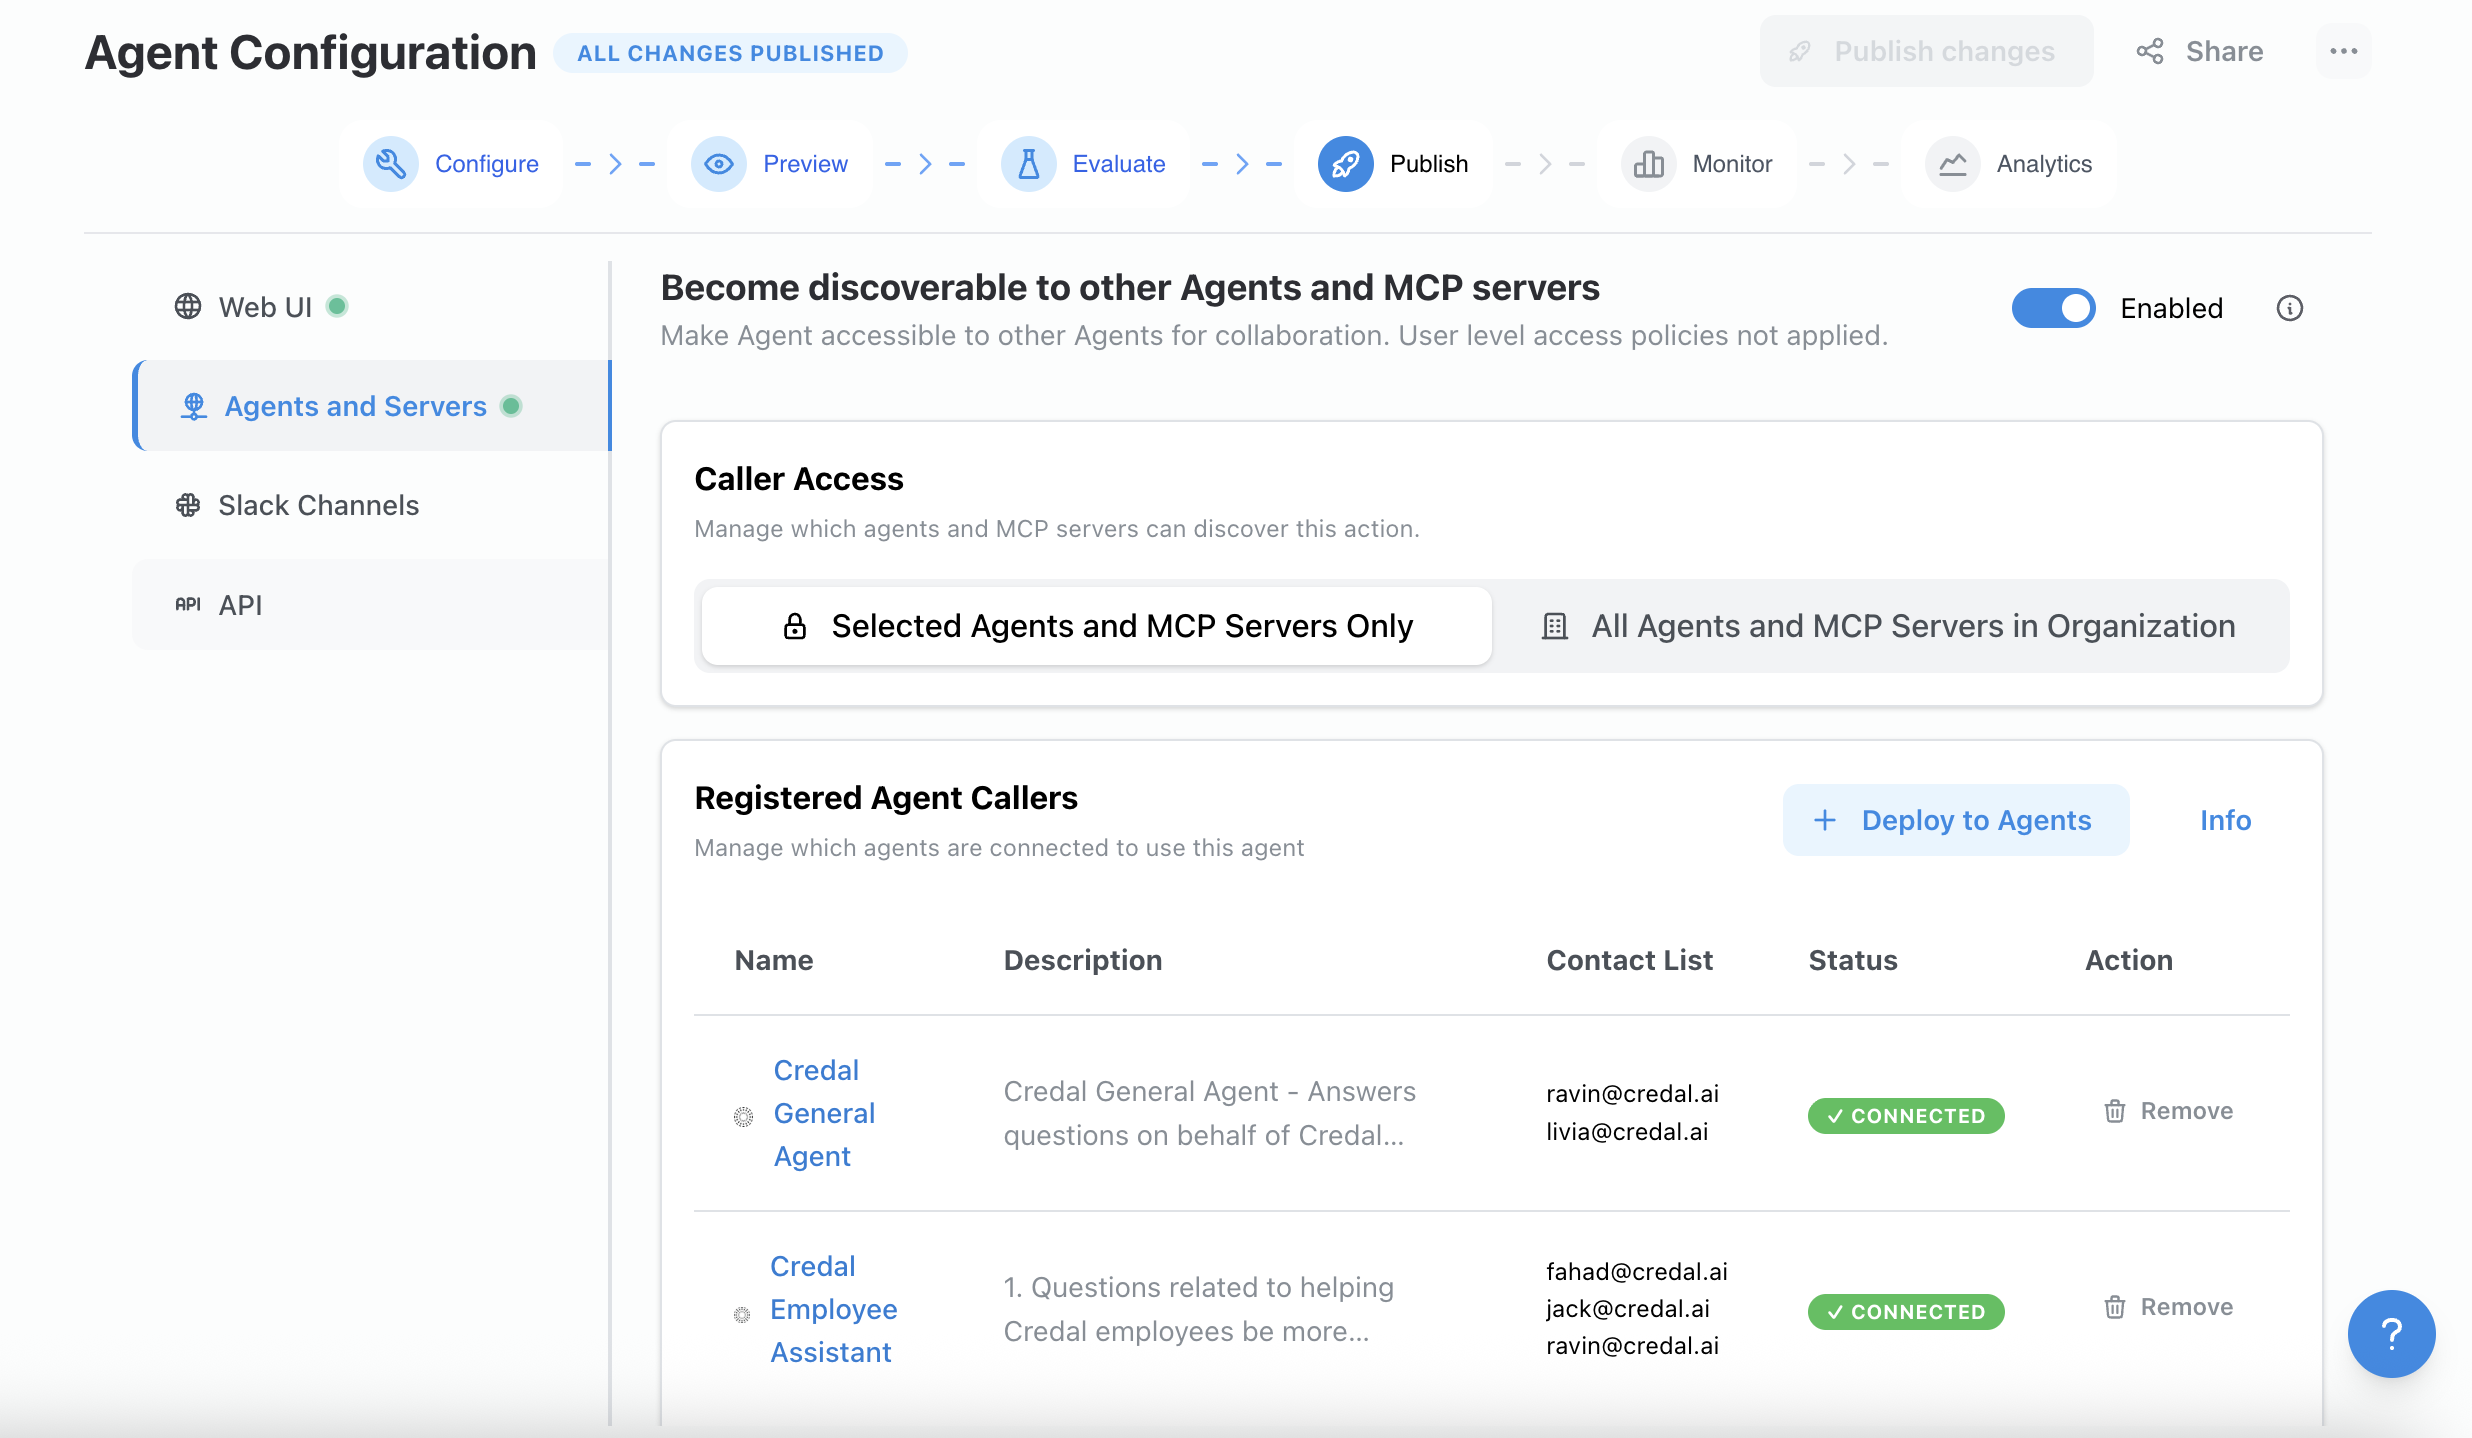
-
Configure who can discover and use your agent:
Option 1: All Agents (Admin Only)
- Makes your agent available to any orchestrator in your organization
- Only organization admins can select this option
- Best for widely-useful agents like “Document Search” or “Data Analysis”
Option 2: Specific Agents
- Add individual orchestrator agents as eligible callers
- Provides granular control over which orchestrators can use your subagent
- Best for specialized agents that should only be used in certain contexts
-
Write a clear Description for your agent—this is what orchestrators will see when deciding whether to call your agent. Include:
- What tasks or questions this agent handles
- What data sources or systems it has access to
- Any limitations or special considerations
Best Practices
- Clear Descriptions: Write detailed descriptions for each subagent so the orchestrator knows when to call them
- Focused Subagents: Keep each subagent specialized—don’t try to make them do too much
- Orchestrator Instructions: Give your orchestrator clear routing logic and examples in its system prompt
- Iterative Testing: Test various query types to ensure proper routing, and refine descriptions as needed
Contact Support
For questions or support, contact support@credal.ai.